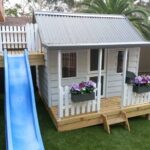
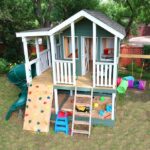
If you’re looking to add a fun and whimsical touch to your backyard, a playhouse is the perfect DIY project to consider. Not only will it provide hours of entertainment for your children, but it can also enhance the overall aesthetics of your outdoor space. Here is a step-by-step guide to help you transform your backyard with a playhouse.
Step 1: Choose a Design The first step in building a playhouse is to choose a design that fits your backyard and your children’s preferences. You can find a variety of playhouse plans online or come up with your own design. Consider factors such as the size of your backyard, the age of your children, and any specific features you want to include, such as a porch or a loft.

Step 2: Gather Materials and Tools Once you have a design in mind, gather all the materials and tools you will need for the project. This may include lumber, nails, screws, paint, roofing materials, and any other supplies required for construction. Make sure to have the necessary tools on hand, such as a saw, hammer, drill, and measuring tape.
Step 3: Prepare the Site Before you start building the playhouse, prepare the site where it will be located. Clear away any debris or obstacles and level the ground if necessary. It’s also a good idea to lay down a foundation, such as pavers or a concrete pad, to provide a stable base for the playhouse.
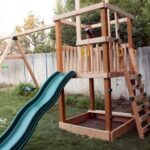
Step 4: Build the Frame Start by building the frame of the playhouse according to your chosen design. This may involve cutting and assembling the walls, roof, and any other structural components. Make sure to secure everything with screws or nails to ensure stability. You may also want to add a door, windows, and other details at this stage.
Step 5: Add Finishing Touches Once the frame is in place, it’s time to add finishing touches to the playhouse. This may include painting the exterior, adding shingles to the roof, and installing any decorative elements, such as flower boxes or a mailbox. You can also customize the interior with flooring, furnishings, and decorations to create a cozy and inviting space for play.
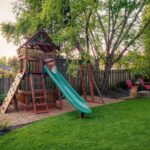
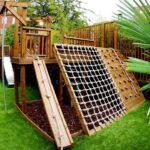
Step 6: Enjoy Your New Playhouse With the construction complete, it’s time to enjoy your new playhouse with your children. Watch as they make memories playing and imagining in their very own backyard hideaway. You can also consider adding additional features, such as a swing set or sandbox, to further enhance the play area.
Building a playhouse in your backyard is a rewarding DIY project that will provide endless fun and creativity for your children. By following these steps, you can transform your outdoor space into a magical playground that will be enjoyed for years to come. Happy building!